
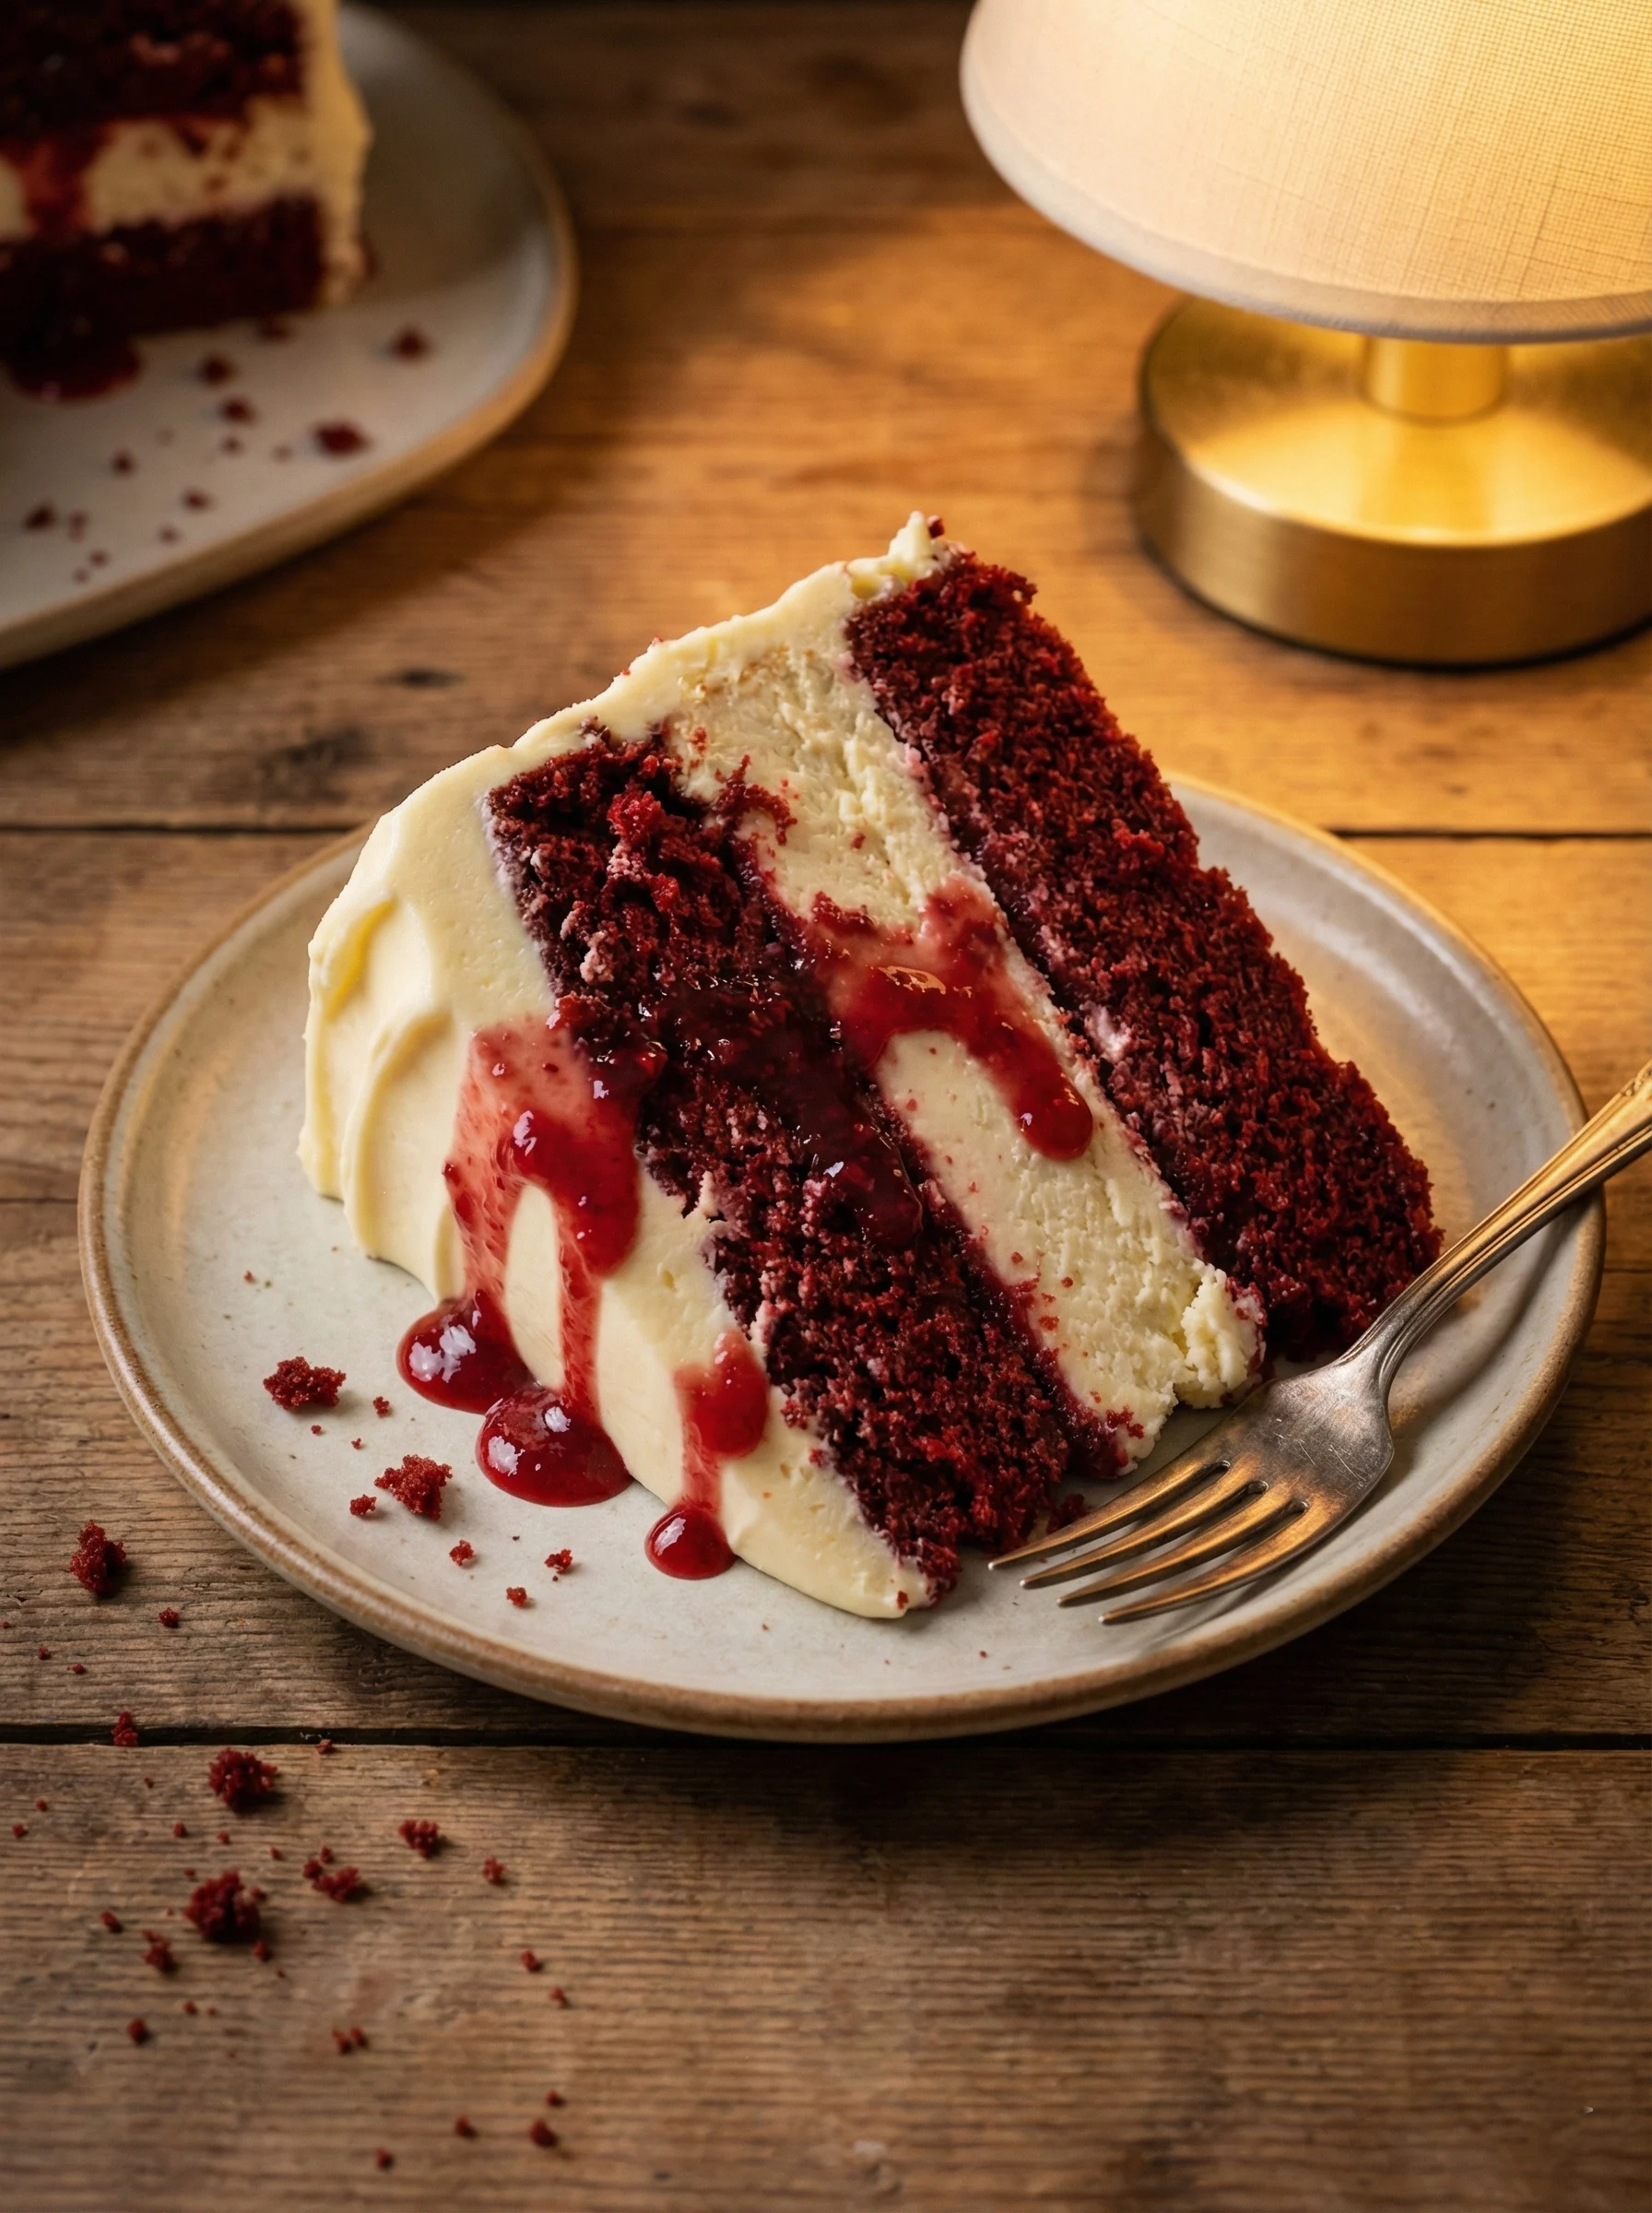
Life moves fast, doesn’t it? One minute you’re conquering deadlines, the next you’re navigating school pickups, and suddenly, you need a showstopper dessert for a celebration tonight. Trust me, I get it.
As a fellow Weeknight Warrior, I thrive on efficiency, but I refuse to compromise on flavor or impact. That’s why I’m absolutely obsessed with this Red Velvet Cheesecake Layer Cake Recipe. I remember the first time I made it for a last-minute potluck.
My usual go-to dessert felt, well, a little boring. I needed something that screamed “I put effort into this!” without actually requiring all day in the kitchen. This recipe delivered in spades.
The reactions? Pure bliss. Everyone raved about the decadent layers, the perfect balance of tang and sweetness, and the sheer visual appeal.
This isn’t just a cake; it’s a statement, and you can make it without sacrificing your precious evening hours. Get ready to impress with this incredible Red Velvet Cheesecake Layer Cake Recipe!
Table of Contents
Why You’ll Love This Red Velvet Cheesecake Layer Cake Recipe
You’re busy. I’m busy. We all crave those moments of culinary triumph without the endless prep time.
This Red Velvet Cheesecake Layer Cake Recipe truly understands our struggle and delivers a knockout. Firstly, you get two epic desserts in one: a moist, vibrant red velvet cake and a rich, creamy cheesecake. This dual-threat combination elevates any occasion, making you look like a pastry wizard.
Furthermore, the instructions are straightforward, designed to maximize impact with minimal fuss. No obscure techniques, just solid baking principles leading to spectacular results. Imagine serving this gorgeous creation – the rich red layers contrasting with the pristine white cheesecake, all crowned with tangy cream cheese frosting.
It’s a visual feast, guaranteed to elicit gasps of delight. Plus, it’s a make-ahead champion, meaning you can assemble parts or even the entire cake in advance, freeing up your celebration day for, well, actual celebrating! This isn’t just a dessert; it’s your secret weapon for making memories, effortlessly. You’ll master this Red Velvet Cheesecake Layer Cake Recipe in no time.
Ingredients You’ll Need
Crafting this magnificent Red Velvet Cheesecake Layer Cake Recipe starts with quality ingredients. Don’t skimp here; each component plays a vital role in achieving that perfect balance of flavor and texture. Gather these essentials, and you’re halfway to dessert nirvana. Trust me, fresh ingredients make all the difference in this incredible Red Velvet Cheesecake Layer Cake.
| Category | Ingredient | Quantity |
|---|---|---|
| For the Red Velvet Cake: | All-purpose flour | 2 ½ cups |
| Granulated sugar | 1 ½ cups | |
| Unsweetened cocoa powder | 1 tbsp | |
| Baking soda | 1 tsp | |
| Salt | ½ tsp | |
| Large eggs | 2 | |
| Buttermilk | 1 cup | |
| Vegetable oil | 1 cup | |
| Distilled white vinegar | 1 tsp | |
| Vanilla extract | 2 tsp | |
| Red food coloring (gel or liquid) | 2 tbsp (or more for desired color) | |
| Hot coffee (or water) | ½ cup | |
| Baking powder | 1 tsp | |
| For the Cheesecake Layer: | Cream cheese, softened | 24 oz (3 blocks) |
| Granulated sugar | ¾ cup | |
| Large eggs | 2 | |
| Vanilla extract | 1 tsp | |
| For the Cream Cheese Frosting: | Cream cheese, softened | 16 oz (2 blocks) |
| Unsalted butter, softened | ½ cup (1 stick) | |
| Powdered sugar | 4-5 cups (to taste) | |
| Vanilla extract | 1 tsp |
Substitutions & Variations
Flexibility is key for any Weeknight Warrior, and this Red Velvet Cheesecake Layer Cake Recipe offers plenty of room for customization. Want to tweak things? Absolutely!
For a gluten-free option, simply swap out the all-purpose flour for a high-quality 1:1 gluten-free baking flour blend. Make sure it contains xanthan gum for optimal texture. If buttermilk isn’t on hand, you can easily make your own by adding one tablespoon of white vinegar or lemon juice to a measuring cup, then filling the rest with regular milk to equal one cup.
Let it sit for 5 minutes; it will curdle slightly, mimicking buttermilk perfectly. For a less intensely red color, reduce the food coloring or omit it entirely for a chocolatey “velvet” cake. You can also experiment with different extracts in the cake or frosting; almond extract adds a delightful nuance, while a touch of orange zest can brighten the cream cheese frosting.
Consider a peppermint extract during the holidays! Feeling extra fancy? Drizzle the top of your finished Red Velvet Cheesecake Layer Cake with melted dark chocolate or sprinkle with chocolate curls.
For a nutty crunch, add chopped pecans or walnuts to the cake batter. This Red Velvet Cheesecake Layer Cake Recipe is your canvas; feel free to get creative!
Flexibility is key for any Weeknight Warrior, and this Red Velvet Cheesecake Layer Cake Recipe offers plenty of room for customization. If you want to enjoy a delicious yet easy-to-make dish along with your dessert, consider trying out a honey garlic glazed salmon, which you can find here.
Step-by-Step Instructions
Let’s get baking! This Red Velvet Cheesecake Layer Cake Recipe breaks down into manageable stages, making the process smooth and enjoyable. Follow these steps for a spectacular dessert experience. You’ll master this Red Velvet Cheesecake Layer Cake in no time.
Visual Guide: We’ve included this video to help you see the techniques in action, but please stick to the written instructions below for the exact recipe.
1. Prepare Your Pans & Preheat Oven:
Firstly, preheat your oven to 350°F (175°C). Grease and flour three 8-inch round cake pans. For the cheesecake, line the bottom of one 8-inch springform pan with parchment paper and grease the sides. Wrap the outside of the springform pan tightly with heavy-duty aluminum foil to prevent any water bath leaks.
2. Make the Cheesecake Layer:
In a large bowl, beat the softened cream cheese with granulated sugar until smooth and creamy. Next, beat in the eggs one at a time, ensuring each is fully incorporated before adding the next. Stir in the vanilla extract.
Pour the cheesecake batter into the prepared springform pan. Place the springform pan inside a larger roasting pan. Carefully pour hot water into the roasting pan, reaching halfway up the sides of the springform pan.
Bake for 45-55 minutes, or until the edges are set but the center still jiggles slightly. Turn off the oven, crack the door, and let the cheesecake cool in the water bath for 1 hour. Remove from the water bath, cool completely on a wire rack, then refrigerate for at least 4 hours, or overnight, until firm. This critical step ensures a perfectly set Red Velvet Cheesecake Layer Cake.
3. Prepare the Red Velvet Cake Batter:
While the cheesecake chills, start your red velvet cake. In a medium bowl, whisk together the flour, granulated sugar, cocoa powder, baking soda, baking powder, and salt. In a separate large bowl, whisk together the buttermilk, vegetable oil, eggs, vinegar, vanilla extract, and red food coloring.
Gradually add the dry ingredients to the wet ingredients, mixing on low speed until just combined. Do not overmix! Finally, stir in the hot coffee (or water). The batter will be thin, and that’s perfectly normal for this Red Velvet Cheesecake Layer Cake Recipe.
4. Bake the Red Velvet Cakes:
Divide the batter evenly among the three prepared 8-inch cake pans. Bake for 25-30 minutes, or until a wooden skewer inserted into the center comes out clean. Let the cakes cool in the pans for 10-15 minutes before inverting them onto a wire rack to cool completely. This careful cooling prevents crumbling for your Red Velvet Cheesecake Layer Cake.
5. Make the Cream Cheese Frosting:
In a large bowl, beat the softened cream cheese and softened butter together until light and fluffy. Gradually add the powdered sugar, one cup at a time, beating until smooth and creamy after each addition. Mix in the vanilla extract.
If the frosting is too thick, add a tiny splash of milk or cream. If too thin, add more powdered sugar. This ensures a perfect consistency for your Red Velvet Cheesecake Layer Cake.
6. Assemble the Red Velvet Cheesecake Layer Cake:
Once all components are completely cool, it’s assembly time! Place one red velvet cake layer on your serving platter. Carefully remove the cheesecake from its springform pan and place it directly on top of the first red velvet cake layer.
Spread a thin layer of cream cheese frosting over the cheesecake. Place the second red velvet cake layer on top of the cheesecake layer. Spread another thin layer of frosting.
Finally, top with the third red velvet cake layer. Frost the entire cake with the remaining cream cheese frosting, using an offset spatula for a smooth finish. Refrigerate the Red Velvet Cheesecake Layer Cake for at least 1 hour to set the frosting before slicing and serving. This Red Velvet Cheesecake Layer Cake Recipe will impress everyone.
Pro Tips for Success
Leo’s got your back! As a Weeknight Warrior, I’ve picked up a few tricks to make this Red Velvet Cheesecake Layer Cake Recipe not just good, but utterly spectacular, without adding extra stress. Implement these tips for a smooth sailing, high-impact dessert.
- Room Temperature Matters: For both the cheesecake and the frosting, ensure your cream cheese, eggs, and butter are at proper room temperature. This creates a smooth, lump-free batter and frosting, preventing overmixing and ensuring a light texture.
- Don’t Overmix the Cake Batter: Mix until just combined. Overmixing develops gluten, leading to a tough, dry cake. A few small lumps are perfectly fine for this Red Velvet Cheesecake Layer Cake.
- Hot Coffee Boosts Flavor: The hot coffee in the red velvet cake batter doesn’t make it taste like coffee; it intensifies the chocolate flavor and makes the cake incredibly moist. Don’t skip this step for your Red Velvet Cheesecake Layer Cake.
- Chill Your Cheesecake Properly: Resist the urge to rush the cooling and chilling of the cheesecake. This is crucial for a firm, perfectly set layer that won’t crack or mush during assembly. Patience here pays off for your Red Velvet Cheesecake Layer Cake.
- Chill Your Frosting if Needed: If your cream cheese frosting seems too soft, especially in a warm kitchen, pop it into the fridge for 15-20 minutes. A slightly firmer frosting is easier to spread and creates cleaner layers for your Red Velvet Cheesecake Layer Cake.
- Level Your Cake Layers: For a professional-looking Red Velvet Cheesecake Layer Cake, use a serrated knife or a cake leveler to trim any domed tops off your red velvet cake layers. This creates flat, even surfaces for stacking.
- Crumb Coat is Your Friend: After stacking, apply a very thin layer of frosting over the entire cake. This is called a crumb coat. Chill the cake for 15-20 minutes, then apply the final, thicker layer of frosting. This traps any stray crumbs, ensuring a pristine finish on your Red Velvet Cheesecake Layer Cake.
Leo’s got your back! As a Weeknight Warrior, I’ve picked up a few tricks to make this Red Velvet Cheesecake Layer Cake Recipe not just good, but utterly spectacular, without adding extra stress. For a delicious, quick meal that pairs wonderfully with your dessert, try the lemon herb grilled tilapia here.
Storage & Reheating Tips
This Red Velvet Cheesecake Layer Cake Recipe is perfect for making ahead, and it stores beautifully. Keep your cake fresh and delicious with these practical tips. You’ll love having this Red Velvet Cheesecake Layer Cake ready to go.
- Refrigeration is Key: Due to the cream cheese in both the cheesecake layer and the frosting, this cake absolutely requires refrigeration. Store it in an airtight cake carrier or under a cake dome.
- How Long it Lasts: Properly stored in the refrigerator, your Red Velvet Cheesecake Layer Cake will stay fresh for up to 5-7 days.
- Serving Temperature: For the best flavor and texture, remove the cake from the refrigerator about 30-60 minutes before serving. This allows the cake and frosting to soften slightly, enhancing their rich flavors.
- Freezing Whole Cake: You can freeze the entire Red Velvet Cheesecake Layer Cake, unfrosted. Wrap each cooled cake layer and the chilled cheesecake layer separately in plastic wrap, then in foil. Freeze for up to 1 month. Thaw in the refrigerator overnight before frosting and assembling.
- Freezing Slices: Freeze individual slices for quick dessert emergencies! Place slices on a baking sheet and freeze until firm, then wrap each slice tightly in plastic wrap and then in foil. Store in a freezer-safe bag or container for up to 1 month. Thaw individual slices in the refrigerator for a few hours, or at room temperature for about 30 minutes, before enjoying. This Red Velvet Cheesecake Layer Cake is incredibly versatile.
What to Serve With This Recipe
This Red Velvet Cheesecake Layer Cake Recipe is a showstopper on its own, but sometimes a little something extra elevates the experience even further. Keep it simple and complementary!
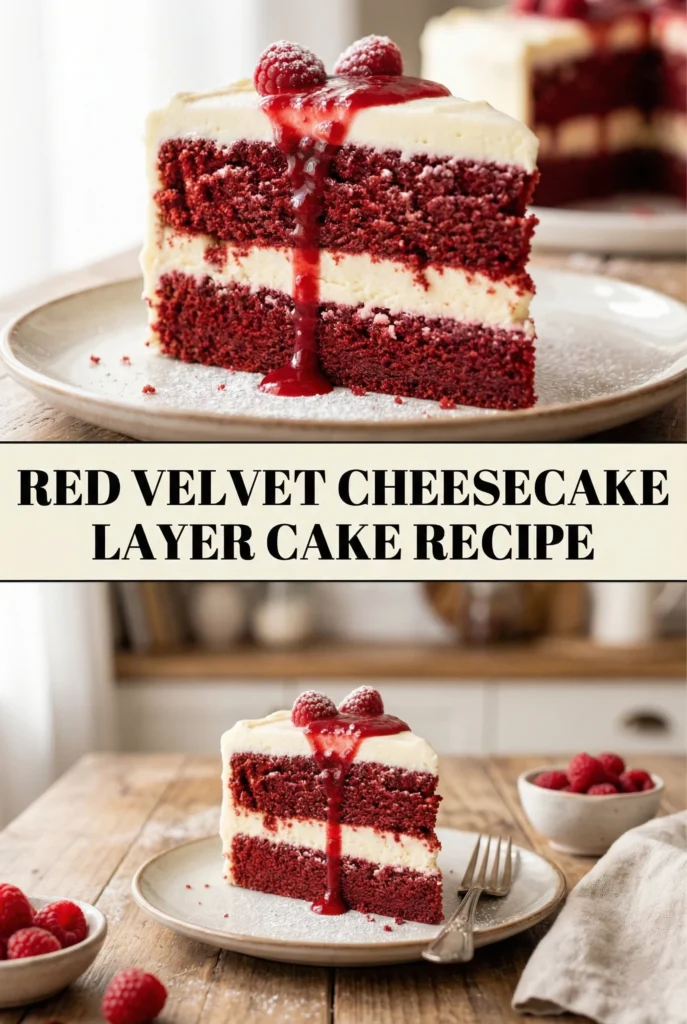
- Fresh Berries: A vibrant mix of fresh raspberries, blueberries, or sliced strawberries adds a burst of freshness and a beautiful color contrast.
- Whipped Cream: A dollop of lightly sweetened homemade whipped cream offers an airy counterpoint to the rich cake and frosting.
- Coffee or Tea: For an adult indulgence, serve slices with a strong espresso, a creamy latte, or a fragrant herbal tea.
- Ice Cream: A scoop of vanilla bean or even a complementary strawberry ice cream alongside a slice of this Red Velvet Cheesecake Layer Cake can be heavenly.
- Sparkling Wine: For special occasions, a glass of prosecco or champagne cuts through the richness and adds a festive touch to your Red Velvet Cheesecake Layer Cake experience.
This Red Velvet Cheesecake Layer Cake Recipe is a showstopper on its own, but sometimes a little something extra elevates the experience even further. If you’re looking for a delightful and complementary dish to serve, consider the shrimp and asparagus sheet pan dinner found here.
FAQs
Can I make the Red Velvet Cheesecake Layer Cake Recipe ahead of time?
Absolutely! This Red Velvet Cheesecake Layer Cake Recipe is a fantastic make-ahead dessert. You can bake the red velvet cake layers and the cheesecake layer up to 2-3 days in advance.
Ensure they cool completely, then wrap the cake layers tightly and refrigerate the cheesecake. You can also make the cream cheese frosting a day in advance and store it in the fridge, then bring it to room temperature and re-whip before frosting. Assemble the Red Velvet Cheesecake Layer Cake the day before your event for stress-free entertaining.
What makes this Red Velvet Cheesecake Layer Cake Recipe stand out?
This Red Velvet Cheesecake Layer Cake Recipe shines due to its innovative combination of two beloved desserts. The tang of the rich cheesecake perfectly balances the subtle cocoa and moisture of the red velvet cake. Moreover, the luxurious cream cheese frosting ties everything together, creating a symphony of textures and flavors.
It’s a dessert that looks incredibly impressive but is surprisingly achievable for home bakers, making it a true standout for any occasion. This isn’t just a cake; it’s an experience, and this Red Velvet Cheesecake Layer Cake Recipe makes it accessible.
Can I freeze individual slices of this Red Velvet Cheesecake Layer Cake Recipe?
Yes, freezing individual slices of this Red Velvet Cheesecake Layer Cake Recipe works wonderfully! Follow the storage instructions: place slices on a baking sheet, freeze until firm, then wrap each slice tightly in plastic wrap and foil. Store in a freezer-safe container for up to a month.
Thaw in the refrigerator for a few hours or at room temperature for about 30 minutes. It’s perfect for portion control or having a special treat whenever the craving strikes for your Red Velvet Cheesecake Layer Cake.
Why did my cheesecake crack?
Cheesecake cracks often happen due to sudden temperature changes. To prevent this when making your Red Velvet Cheesecake Layer Cake, make sure you don’t overbake it. The center should still have a slight jiggle.
More importantly, let the cheesecake cool gradually. Leave it in the turned-off oven with the door ajar for an hour after baking, then cool completely on a wire rack before refrigerating. This slow cooling helps prevent cracks in your Red Velvet Cheesecake Layer Cake.
Can I use liquid red food coloring instead of gel for the Red Velvet Cheesecake Layer Cake?
Yes, you can use liquid red food coloring, but you might need significantly more to achieve the vibrant red hue characteristic of a Red Velvet Cheesecake Layer Cake. Gel food coloring is much more concentrated, so start with the recommended amount for gel and add liquid coloring gradually until you reach your desired depth of color, being mindful not to add too much liquid which could alter the batter consistency.
Red velvet cake is a well-loved dessert known for its bold red color and chocolate flavor, often paired with cream cheese frosting. This delightful cake has variations, such as the layered dessert combining cheesecake and red velvet, offering a memorable and visually appealing treat, which you can learn more about in this detailed article.
Nutrition Information (per serving)
Enjoying this decadent Red Velvet Cheesecake Layer Cake Recipe means indulging in rich flavors. Here’s a general nutritional breakdown to help you plan. Please note, these are estimates and can vary based on specific ingredient brands and portion sizes for your Red Velvet Cheesecake Layer Cake.
| Nutrient | Amount |
|---|---|
| Calories | ~650-750 kcal |
| Total Fat | ~45-55g |
| Saturated Fat | ~25-30g |
| Cholesterol | ~150-180mg |
| Sodium | ~400-500mg |
| Total Carbohydrates | ~60-70g |
| Dietary Fiber | ~1-2g |
| Total Sugars | ~45-55g |
| Protein | ~8-10g |
Red Velvet Cheesecake Layer Cake Recipe
- Total Time: 3 hours (including chilling time)
- Yield: 12 servings 1x
- Diet: Vegetarian
Description
This Red Velvet Cheesecake Layer Cake Recipe combines two decadent desserts in one stunning presentation, featuring moist red velvet layers and rich cheesecake topped with a cream cheese frosting.
Ingredients
2 ½ cups All-purpose flour
1 ½ cups Granulated sugar
1 tbsp Unsweetened cocoa powder
1 tsp Baking soda
½ tsp Salt
2 Large eggs
1 cup Buttermilk
1 cup Vegetable oil
1 tsp Distilled white vinegar
2 tsp Vanilla extract
2 tbsp Red food coloring (gel or liquid)
½ cup Hot coffee
1 tsp Baking powder
24 oz Cream cheese, softened
¾ cup Granulated sugar
2 Large eggs
1 tsp Vanilla extract (for cheesecake)
16 oz Cream cheese, softened (for frosting)
½ cup Unsalted butter, softened
4–5 cups Powdered sugar (to taste)
1 tsp Vanilla extract (for frosting)
Instructions
- Preheat oven to 350°F (175°C) and prepare cake and cheesecake pans
- Make the cheesecake layer and bake for 45-55 minutes, then cool
- Prepare the red velvet cake batter and bake each layer for 25-30 minutes
- Make the cream cheese frosting
- Assemble the cake with alternating layers of red velvet and cheesecake topped with frosting
Notes
Chill the cheesecake thoroughly before assembly for a perfect layer.
Use room temperature ingredients for a smoother batter and frosting.
- Prep Time: 30 mins
- Cook Time: 1 hour
- Category: Dessert
- Method: Baking
- Cuisine: American
Nutrition
- Serving Size: 1 slice
- Calories: 700 kcal
- Sugar: 50 g
- Sodium: 450 mg
- Fat: 48 g
- Saturated Fat: 30 g
- Unsaturated Fat: 10 g
- Trans Fat: 0 g
- Carbohydrates: 65 g
- Fiber: 2 g
- Protein: 8 g
- Cholesterol: 150 mg