
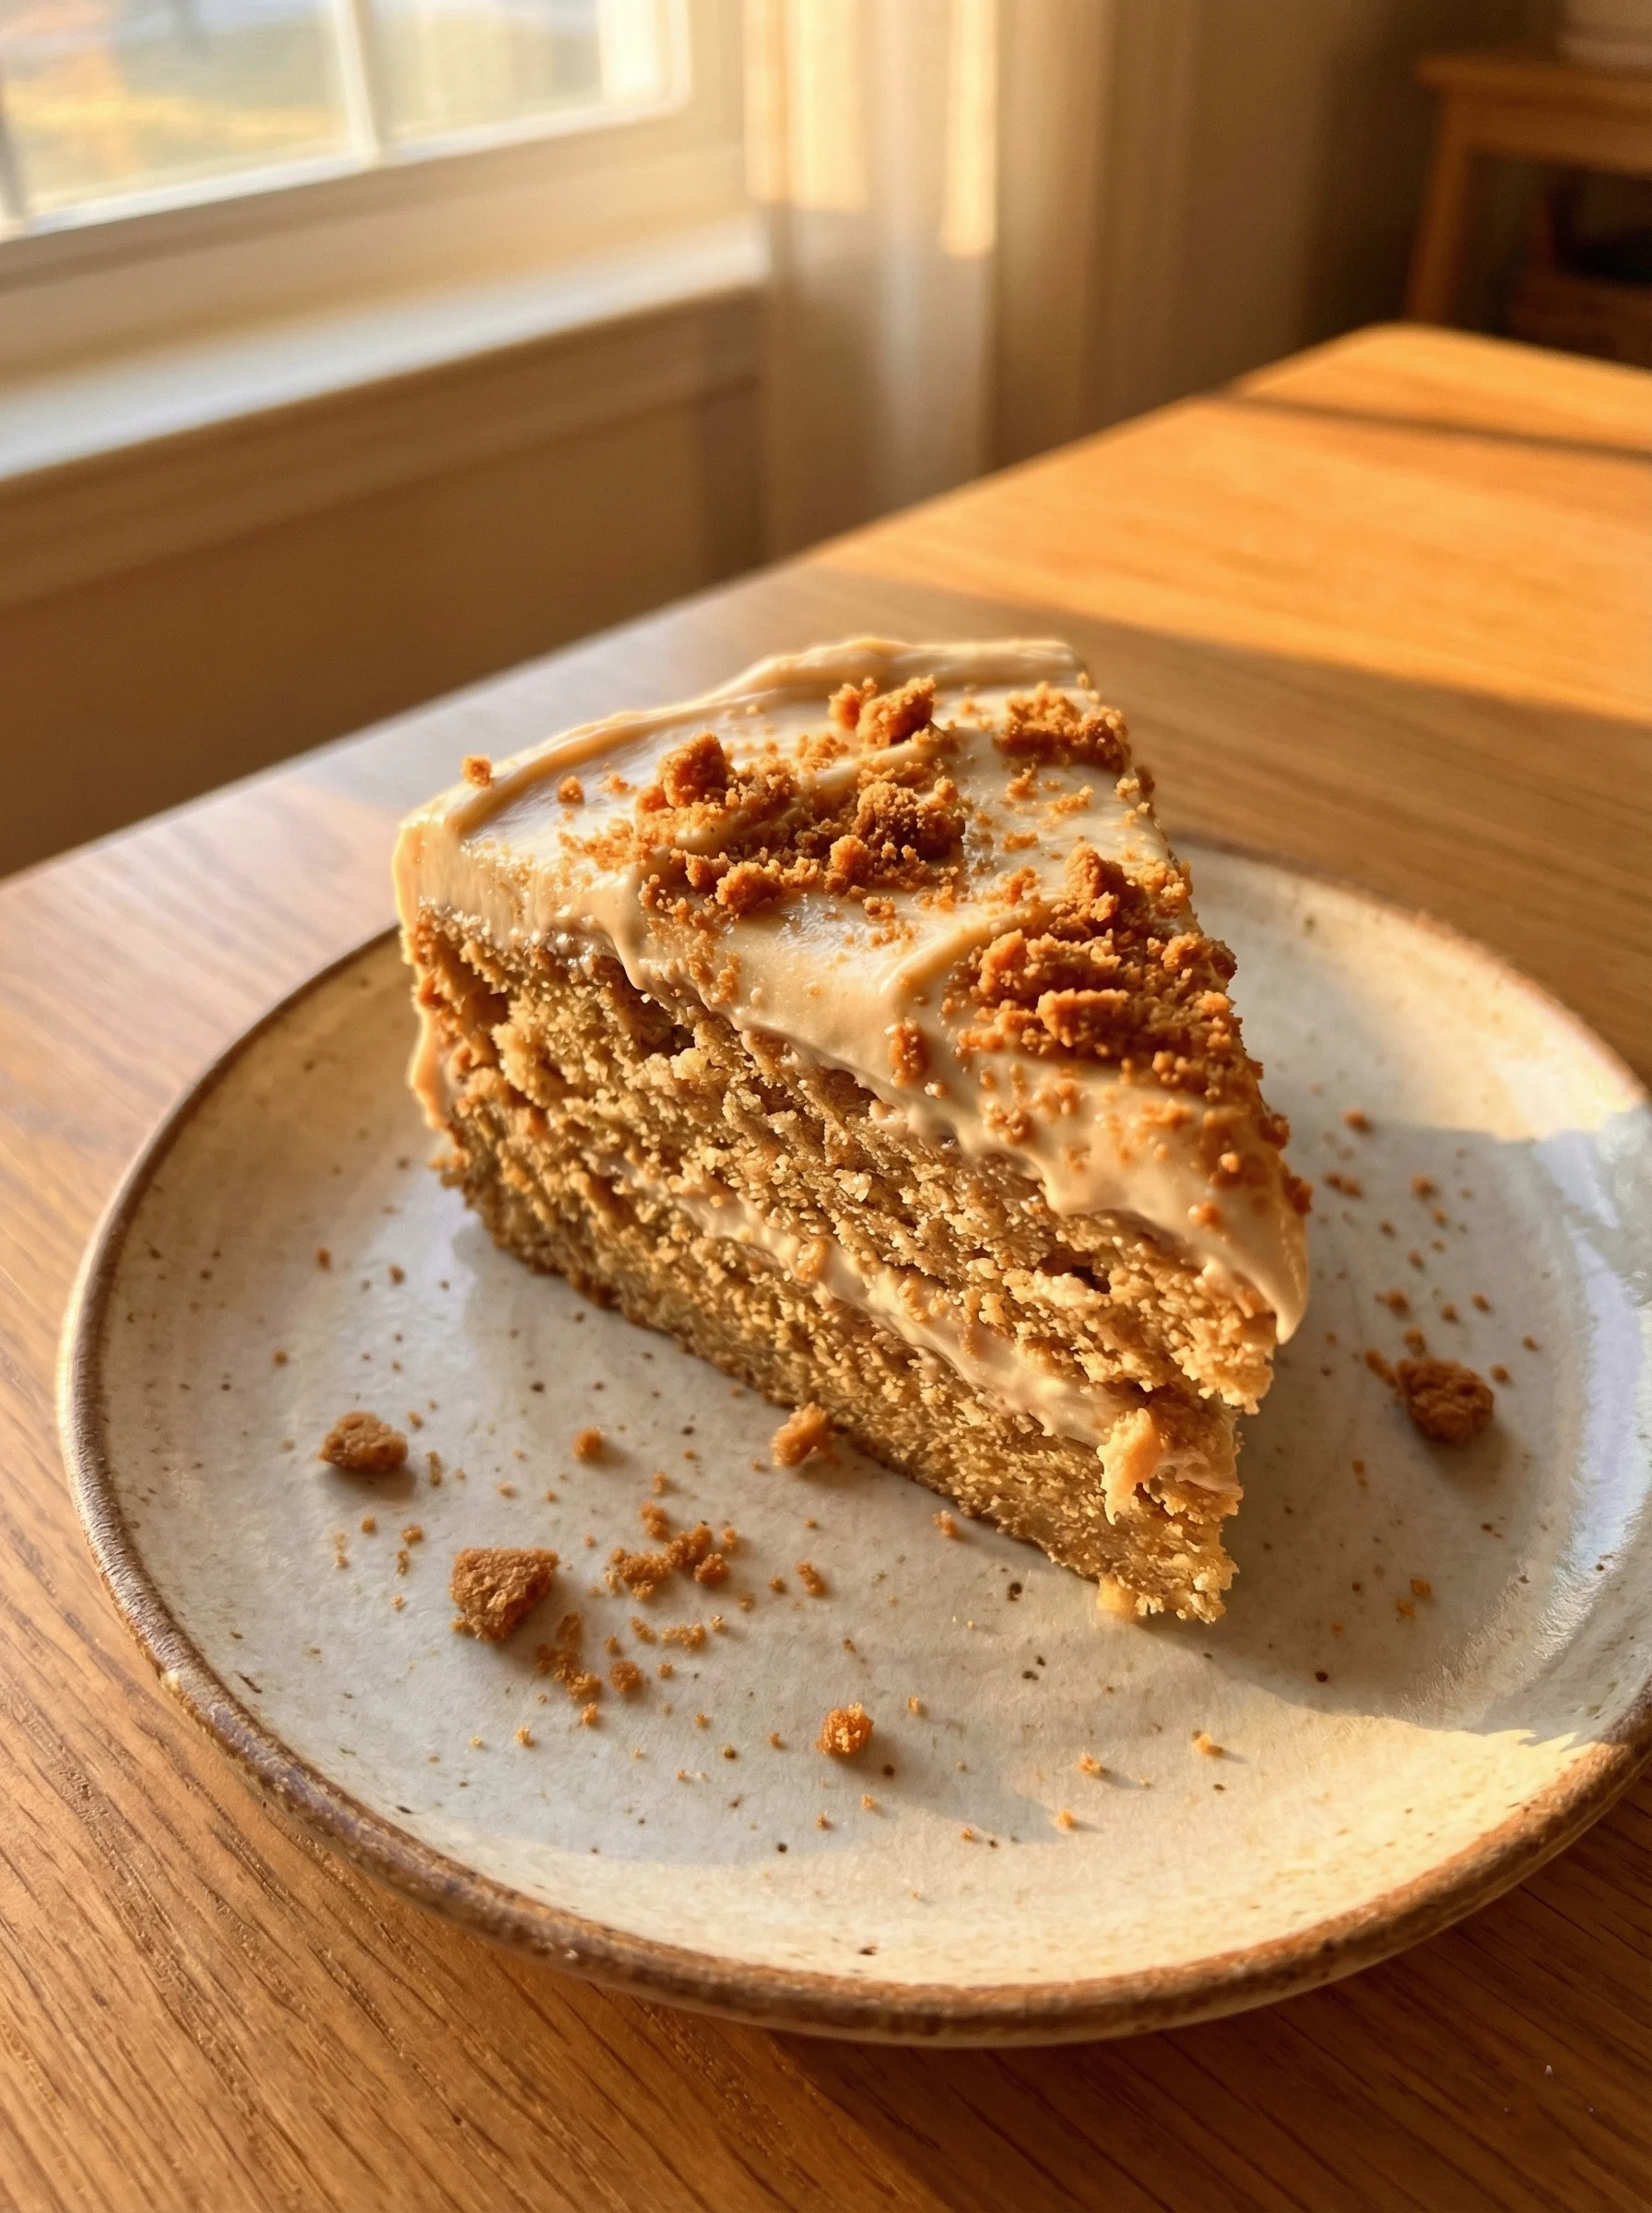
My kitchen often feels like a bustling hub, a place where a little bit of magic happens amidst the daily routines. I vividly remember one rainy afternoon, my son, usually a picky eater, watched me intently as I worked on a new dessert. He’d just discovered Biscoff cookies, and their unique spiced caramel flavor had captivated him.
As I frosted the final layers, he took a sneak peek and his eyes widened. The aroma of warm spices and sweet cookie butter filled the air, promising something truly special. That day, my Creamy, Dreamy Biscoff Cookie Butter Cake officially earned its name, not just for its incredible flavor but for the sheer joy it brought to our table.
This isn’t just a recipe; it’s an experience, a delightful journey into a world of rich, comforting flavors that everyone adores. I’ve taken my favorite professional baking techniques and simplified them, ensuring you can recreate this stunning Biscoff cookie butter cake with ease and confidence. Get ready to transform your kitchen into a sweet-smelling haven with this spectacular creamy Biscoff cake that’s guaranteed to impress every time.
Table of Contents
Why You’ll Love This Recipe
You’re about to discover your new favorite dessert with this Creamy, Dreamy Biscoff Cookie Butter Cake. What makes it so irresistible? First, the flavor profile is simply out of this world.
Imagine tender, moist cake layers infused with the distinctive caramelized notes of Biscoff cookies, generously filled with a velvety cookie butter cream, and then draped in a luscious, not-too-sweet frosting. It’s a symphony of textures and tastes that truly stands out. This creamy Biscoff cake isn’t just delicious; it’s a showstopper, perfect for birthdays, holidays, or any time you want to create a memorable moment.
Moreover, I’ve designed this recipe to be accessible for home cooks. You don’t need years of professional experience to achieve stunning results. We break down each step, ensuring you master every technique.
From perfectly balanced layers to that incredible Biscoff cookie butter cake filling, you’ll feel like a pro. Plus, the sheer joy of watching friends and family rave about your baking masterpiece is truly priceless. This dreamy Biscoff cake promises ease, elegance, and pure deliciousness.
Ingredients You’ll Need
Crafting this spectacular Creamy, Dreamy Biscoff Cookie Butter Cake begins with selecting quality ingredients. Each component plays a vital role in building those incredible layers of flavor and texture. Gather these items, and you are well on your way to baking perfection.
| For the Cake Layers | For the Cookie Butter Filling | For the Biscoff Buttercream Frosting |
|---|---|---|
| 2 ½ cups all-purpose flour | 1 cup Biscoff cookie butter, smooth | 1 cup (2 sticks) unsalted butter, softened |
| 2 teaspoons baking powder | 8 ounces cream cheese, softened | 4 cups powdered sugar, sifted |
| ½ teaspoon baking soda | ½ cup powdered sugar, sifted | ½ cup Biscoff cookie butter, smooth |
| ½ teaspoon salt | 1 teaspoon vanilla extract | 1 teaspoon vanilla extract |
| 1 cup (2 sticks) unsalted butter, softened | ¼ cup heavy cream | ¼ cup heavy cream or milk |
| 1 ½ cups granulated sugar | Pinch of salt | |
| 3 large eggs, room temperature | ||
| 1 teaspoon vanilla extract | ||
| 1 cup buttermilk, room temperature | ||
| ½ cup Biscoff cookie butter, melted and cooled slightly |
Substitutions & Variations
Even the most perfect recipe, like our Creamy, Dreamy Biscoff Cookie Butter Cake, can adapt to your preferences or what you have on hand. Don’t shy away from experimenting; baking is an art, and you are the artist!
* Dairy-Free Delight: For a dairy-free version of this Biscoff cookie butter cake, substitute unsalted butter with a high-quality plant-based butter stick (like Miyoko’s Kitchen or Earth Balance baking sticks). Use unsweetened almond milk or oat milk instead of buttermilk (add 1 tablespoon of lemon juice or apple cider vinegar to 1 cup of plant-based milk and let it sit for 5 minutes before using as a buttermilk substitute). For the frosting, use dairy-free cream cheese and plant-based heavy cream.
* Gluten-Free Flour: You can easily make this a gluten-free dreamy Biscoff cake. Simply swap the all-purpose flour for a 1:1 gluten-free baking flour blend that contains xanthan gum. Ensure all your other ingredients, especially the Biscoff cookie butter, are certified gluten-free if strict dietary requirements apply.
* Spice It Up: Enhance the warm, spiced notes of your creamy Biscoff cake. Add ½ teaspoon of ground cinnamon or a pinch of ground ginger to the dry ingredients for the cake layers. These subtle additions complement the Biscoff flavor beautifully.
* Nut Butter Twist: While this is a Biscoff cookie butter cake, if you’re feeling adventurous or can’t find Biscoff, you could experiment with other smooth nut butters like almond butter or cashew butter in the cake batter and frosting. Keep in mind this will significantly change the flavor profile from the signature Biscoff taste.
* Chocolate Drizzle: Elevate the presentation and taste of your Creamy, Dreamy Biscoff Cookie Butter Cake with a simple chocolate ganache drizzle.
Melt 4 oz of good quality dark chocolate with 2 tablespoons of heavy cream, cool slightly, then drizzle over the top of the finished cake.
* Crunchy Topping: For added texture, crush some extra Biscoff cookies and sprinkle them over the top of the frosted Biscoff cookie butter cake. This adds a delightful crunch and reinforces the cookie flavor.
* Espresso Kick: A teaspoon of instant espresso powder dissolved in a tablespoon of hot water and added to the cake batter or buttercream can deepen the flavors and add a subtle coffee note that pairs wonderfully with Biscoff. This variation truly makes a luxurious creamy Biscoff cake.
Even the most perfect recipe, like our Creamy, Dreamy Biscoff Cookie Butter Cake, can adapt to your preferences or what you have on hand. Don’t shy away from experimenting; baking is an art, and you are the artist! If you’re looking for more delicious options, check out my recipe for Honey Garlic Glazed Salmon.
Step-by-Step Instructions
Visual Guide: We’ve included this video to help you see the techniques in action, but please stick to the written instructions below for the exact recipe.
Creating this magnificent Creamy, Dreamy Biscoff Cookie Butter Cake might seem like a grand undertaking, but I promise, with these clear, step-by-step instructions, you’ll find it incredibly rewarding and surprisingly straightforward. Let’s bake this extraordinary Biscoff cookie butter cake together!
Prepare the Cake Layers:
1. Preheat and Prep: Preheat your oven to 350°F (175°C). Grease and flour three 8-inch round cake pans.
Line the bottoms with parchment paper circles. This ensures your creamy Biscoff cake layers release beautifully.
2.
Combine Dry Ingredients: In a medium bowl, whisk together the all-purpose flour, baking powder, baking soda, and salt. Set aside.
3.
Cream Butter and Sugar: In a large bowl, using an electric mixer, cream the softened unsalted butter and granulated sugar together until light and fluffy, about 3-4 minutes. Scrape down the sides of the bowl often. This step incorporates air, making your dreamy Biscoff cake light and tender.
4. Add Eggs and Vanilla: Beat in the eggs one at a time, incorporating each fully before adding the next. Stir in the vanilla extract.
5. Alternate Wet and Dry: Gradually add the dry ingredients to the wet ingredients, alternating with the buttermilk, beginning and ending with the dry ingredients. Mix on low speed until just combined.
Do not overmix! Overmixing develops gluten, resulting in a tough cake.
6.
Fold in Biscoff: Gently fold in the melted and cooled Biscoff cookie butter until streaks disappear. This infuses the cake with that signature Biscoff flavor, making a truly amazing Biscoff cookie butter cake.
7.
Divide and Bake: Divide the batter evenly among the three prepared cake pans. Bake for 25-30 minutes, or until a wooden skewer inserted into the center comes out clean.
8.
Cool: Let the cakes cool in the pans on a wire rack for 10-15 minutes before inverting them onto the rack to cool completely. Cooling completely is crucial before frosting this Creamy, Dreamy Biscoff Cookie Butter Cake.
Make the Cookie Butter Filling:
1. Beat Ingredients: In a medium bowl, combine the Biscoff cookie butter, softened cream cheese, powdered sugar, and vanilla extract. Beat with an electric mixer until smooth and well combined.
2. Whip in Cream: Gradually add the heavy cream and beat until the mixture is light, fluffy, and holds its shape. Set aside. This makes the delightful creamy center for your Biscoff cookie butter cake.
Prepare the Biscoff Buttercream Frosting:
1. Cream Butter: In a large bowl, beat the softened unsalted butter with an electric mixer until light and creamy, about 2-3 minutes.
2.
Add Sugar and Biscoff: Gradually add the sifted powdered sugar, about a cup at a time, beating well after each addition. Stir in the Biscoff cookie butter, vanilla extract, and a pinch of salt.
3.
Add Liquid: With the mixer on low speed, slowly pour in the heavy cream or milk until the frosting reaches your desired consistency. Beat on high speed for another 1-2 minutes until it’s light and fluffy. This frosting is the crowning glory of your creamy Biscoff cake.
Assemble the Creamy, Dreamy Biscoff Cookie Butter Cake:
1. Level Cakes: If your cake layers have domed tops, use a serrated knife to carefully level them, creating flat surfaces for stacking. This ensures a stable and beautiful dreamy Biscoff cake.
2. First Layer: Place one cake layer on your serving plate or cake stand. Spread about half of the cookie butter filling evenly over the top.
3. Second Layer: Carefully place the second cake layer on top of the filling. Spread the remaining cookie butter filling over this layer.
4. Third Layer: Place the final cake layer on top.
5.
Crumb Coat: Apply a thin layer of Biscoff buttercream frosting all over the cake – top and sides. This is your “crumb coat,” which traps any loose crumbs. Refrigerate the cake for 20-30 minutes to set the crumb coat.
This step creates a professional finish for your Creamy, Dreamy Biscoff Cookie Butter Cake.
6. Final Frosting: Once the crumb coat is firm, apply the remaining Biscoff buttercream frosting, smoothing the top and sides with an offset spatula or bench scraper for a polished look.
7. Decorate (Optional): Garnish with crushed Biscoff cookies, a drizzle of melted Biscoff cookie butter, or even a few whole cookies.
8.
Chill and Serve: Refrigerate the finished Biscoff cookie butter cake for at least 30 minutes before slicing and serving. This allows the frosting to set and makes for cleaner cuts.
Pro Tips for Success
Baking a show-stopping dessert like this Creamy, Dreamy Biscoff Cookie Butter Cake involves more than just following steps; it requires a few insider tricks to truly elevate your results. As a professional mom-chef, I’ve honed these techniques to ensure your Biscoff cookie butter cake turns out perfect every time.
* Room Temperature Ingredients are Key: This cannot be overstated! For cakes and buttercreams, always ensure your butter, eggs, and buttermilk are at room temperature. This allows them to emulsify properly, creating a smooth, homogenous batter and frosting that traps air efficiently, resulting in a lighter, fluffier creamy Biscoff cake.
Take them out of the fridge at least 30-60 minutes before you begin.
* Measure Flour Correctly: Spoon your flour into the measuring cup, then level it off with a straight edge. Do not scoop directly from the bag; this compacts the flour, adding too much and resulting in a dense, dry cake.
Precision in measuring dry ingredients ensures a perfectly textured dreamy Biscoff cake.
* Don’t Overmix: Once you add flour to your wet ingredients, mix only until just combined. Overmixing develops gluten, leading to a tough, rubbery cake.
A few small lumps are perfectly fine and will bake out. Gentle handling creates a tender Biscoff cookie butter cake.
* Cool Cakes Completely: Resist the urge to frost warm cakes!
Warm cakes melt frosting, leading to a messy disaster. Ensure your cake layers are completely cool to the touch before assembling and frosting. This patience ensures a clean, beautiful finish for your Creamy, Dreamy Biscoff Cookie Butter Cake.
* Sift Powdered Sugar: For the smoothest, lump-free frosting and filling, always sift your powdered sugar. This simple step makes a remarkable difference in the texture of your Biscoff buttercream and cookie butter filling, giving your creamy Biscoff cake that professional, silky mouthfeel.
* Use Good Quality Cookie Butter: The star of this Biscoff cookie butter cake is, naturally, the Biscoff cookie butter itself.
Invest in a good quality, smooth variety for the best flavor and texture in your cake layers, filling, and frosting.
* Chill Between Steps: Chilling the cake after the crumb coat is vital. It sets the thin layer of frosting, locking in crumbs and creating a stable surface for your final, smooth frosting layer.
This technique makes decorating your dreamy Biscoff cake much easier and cleaner.
* Level Your Cakes: If your cake layers bake with domed tops, use a serrated knife or a cake leveler to trim them flat. Flat layers stack neatly, creating a professional-looking, stable Biscoff cookie butter cake.
* Taste and Adjust: Always taste your frosting and filling before applying them. Sometimes a pinch more salt can balance the sweetness, or an extra splash of vanilla can deepen the flavor. Make this Creamy, Dreamy Biscoff Cookie Butter Cake truly your own!
Baking a show-stopping dessert like this Creamy, Dreamy Biscoff Cookie Butter Cake involves more than just following steps; it requires a few insider tricks to truly elevate your results. As a professional mom-chef, I’ve honed these techniques to ensure your Biscoff cookie butter cake turns out perfect every time. To enhance your culinary skills even further, try my Lemon Herb Grilled Tilapia.
Storage & Reheating Tips
Proper storage is crucial to maintain the incredible freshness and flavor of your Creamy, Dreamy Biscoff Cookie Butter Cake. You want every slice to taste as amazing as the first!
* Refrigeration is Key: Because this Biscoff cookie butter cake contains cream cheese in the filling and buttercream, you must store it in the refrigerator. Place the cake in an airtight cake carrier or cover it loosely with plastic wrap to prevent it from drying out or absorbing refrigerator odors. It will stay fresh for up to 5 days.
* Bring to Room Temperature for Serving: For the best flavor and texture, remove your creamy Biscoff cake from the refrigerator about 30-60 minutes before serving. This allows the cake and frosting to soften slightly, bringing out all those wonderful, complex flavors. A cold dreamy Biscoff cake can taste a bit dense; room temperature truly unlocks its magic.
* Freezing Whole Cake (Unfrosted Layers): You can freeze individual unfrosted cake layers for up to 2-3 months. Wrap each cooled layer tightly in plastic wrap, then in aluminum foil. Thaw them overnight in the refrigerator before assembling your Creamy, Dreamy Biscoff Cookie Butter Cake.
* Freezing Slices: If you have leftover slices of your Biscoff cookie butter cake, wrap each slice individually in plastic wrap, then place them in an airtight container. Freeze for up to 1 month. Thaw individual slices in the refrigerator overnight, or at room temperature for a few hours.
* No Reheating: This type of cake, with its delicate frosting and filling, does not require or benefit from reheating. Enjoy your Biscoff cookie butter cake at room temperature for the ultimate experience.
What to Serve With This Recipe
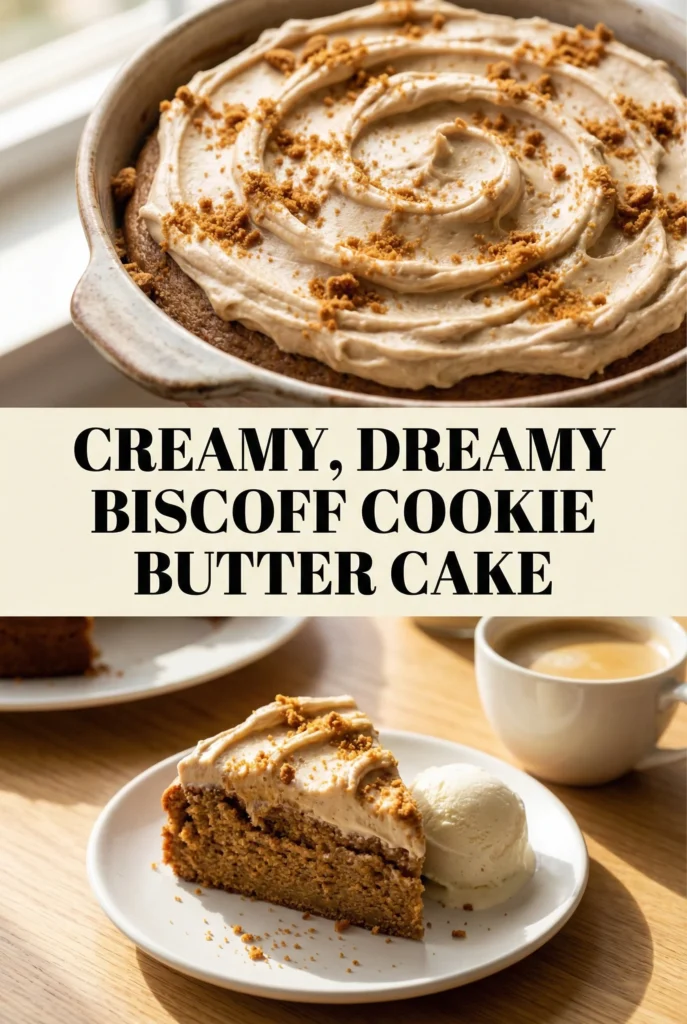
The Creamy, Dreamy Biscoff Cookie Butter Cake truly shines on its own, but pairing it with the right accompaniments can elevate the experience even further. Think about balance and complementing flavors!
* A Steaming Cup of Coffee or Tea: The rich, spiced notes of this Biscoff cookie butter cake are a match made in heaven with a strong cup of coffee. A classic black coffee cuts through the sweetness beautifully. For tea lovers, a robust black tea like Earl Grey or a fragrant chai would be delightful.
* A Scoop of Vanilla Bean Ice Cream: The warmth of the Biscoff combined with cold, creamy vanilla ice cream creates an incredible textural and temperature contrast. This simple addition turns a slice of creamy Biscoff cake into a gourmet dessert.
* Fresh Berries: A light scattering of fresh raspberries or blueberries offers a bright, tart counterpoint to the richness of the dreamy Biscoff cake.
Their natural acidity cleanses the palate and adds a pop of color.
* A Glass of Milk: Sometimes, the simplest pairings are the best. A cold glass of milk perfectly complements the sweet, comforting flavors of your Biscoff cookie butter cake, especially for children (and many adults!).
* Chantilly Cream: A dollop of lightly sweetened, freshly whipped cream (Chantilly cream) can add an extra layer of elegance and lightness, enhancing the “creamy” aspect of this Creamy, Dreamy Biscoff Cookie Butter Cake.
* A Dessert Wine: For an adult pairing, consider a late-harvest Riesling or a Muscat. Their sweetness and often fruity, honeyed notes can beautifully echo and enhance the caramelized spices in the Biscoff cookie butter cake.
The Creamy, Dreamy Biscoff Cookie Butter Cake truly shines on its own, but pairing it with the right accompaniments can elevate the experience even further. Think about balance and complementing flavors! A steaming cup of coffee or tea goes wonderfully with this cake—take a look at my recipe for Shrimp and Asparagus Sheet Pan Dinner for more meal ideas.
FAQs
Can I make the Creamy, Dreamy Biscoff Cookie Butter Cake ahead of time?
Absolutely! You can bake the cake layers up to 2 days in advance. Wrap them tightly in plastic wrap once completely cooled and store them at room temperature.
You can also make the cookie butter filling and Biscoff buttercream frosting a day ahead and store them in the refrigerator in airtight containers. Let the frosting come to room temperature and give it a quick whip before assembling your Creamy, Dreamy Biscoff Cookie Butter Cake.
What if I can’t find Biscoff cookie butter?
While Biscoff cookie butter is essential for the authentic flavor of this Biscoff cookie butter cake, if you absolutely cannot find it, you might find other brands of “speculoos spread” or “gingerbread cookie spread.” The flavor will be very similar, though Biscoff has a unique caramelized depth. Alternatively, you could try a different nut butter, but be aware this will change the character of your creamy Biscoff cake significantly.
How do I prevent my cake layers from sticking to the pan?
The key is thorough preparation. Always grease your pans generously with butter or cooking spray, then dust with flour, tapping out any excess. For an extra layer of security, cut parchment paper circles to fit the bottom of your pans. This technique ensures your Creamy, Dreamy Biscoff Cookie Butter Cake layers release cleanly every time.
My Biscoff buttercream looks curdled. What should I do?
Don’t panic! This sometimes happens if ingredients aren’t at the right temperature or if you add liquid too quickly. Continue beating on medium-high speed.
Often, the butter will re-emulsify and become smooth and fluffy again. If it’s still looking off, try gently warming a small portion of the frosting in the microwave for 5-10 seconds, then add it back to the bowl and beat again. This usually rescues the frosting for your dreamy Biscoff cake.
Can I make this Creamy, Dreamy Biscoff Cookie Butter Cake into cupcakes?
Yes, you certainly can! The cake batter recipe works beautifully for cupcakes. Line a muffin tin with paper liners and fill each about two-thirds full.
Bake for approximately 18-22 minutes, or until a toothpick inserted comes out clean. Adjust the frosting quantities as needed for a batch of cupcakes. This makes a delightful bite-sized Biscoff cookie butter cake treat!
The Creamy, Dreamy Biscoff Cookie Butter Cake is a delightful dessert that captures the essence of spiced caramel flavors found in Biscoff cookies. For those interested in the origins of the unique cookie that inspired this cake, you can explore more about Biscoff cookies.
Nutrition Information (per serving)
Please note: This is an estimated nutritional breakdown for one slice of our Creamy, Dreamy Biscoff Cookie Butter Cake, calculated based on an average of 12 servings per cake. Actual values may vary based on specific ingredients and portion sizes.
| Nutrient | Amount |
|---|---|
| Calories | 580 kcal |
| Total Fat | 35g |
| Saturated Fat | 20g |
| Cholesterol | 110mg |
| Sodium | 310mg |
| Total Carbohydrates | 65g |
| Dietary Fiber | 1g |
| Total Sugars | 48g |
| Protein | 6g |
Creamy, Dreamy Biscoff Cookie Butter Cake
- Total Time: 2 hrs
- Yield: 12 servings 1x
- Diet: Vegetarian
Description
Creamy, Dreamy Biscoff Cookie Butter Cake is a delightful dessert featuring layers of moist cake infused with the caramelized flavor of Biscoff cookies, filled with velvety cookie butter cream, and frosted with a luscious buttercream. This recipe promises an exquisite blend of textures and tastes, perfect for any celebratory occasion.
Ingredients
2 ½ cups All-purpose flour
2 teaspoons Baking powder
½ teaspoon Baking soda
½ teaspoon Salt
1 ½ cups Granulated sugar
3 Large eggs (room temperature)
1 teaspoon Vanilla extract
1 cup Buttermilk (room temperature)
½ cup Biscoff cookie butter (melted and cooled slightly)
1 cup Biscoff cookie butter (smooth)
8 ounces Cream cheese (softened)
4 cups Powdered sugar (sifted)
1 cup (2 sticks) Unsalted butter (softened)
¼ cup Heavy cream
Pinch of salt
Instructions
- Preheat your oven to 350°F (175°C) and prepare three 8-inch round cake pans
- In a medium bowl, whisk together the flour, baking powder, baking soda, and salt
- In a large bowl, cream together the unsalted butter and granulated sugar until light and fluffy
- Add eggs one at a time, and stir in the vanilla extract
- Gradually mix in the dry ingredients alternating with buttermilk
- Fold in the melted Biscoff cookie butter
- Divide the batter into the prepared pans and bake for 25-30 minutes
- Allow the cakes to cool completely before frosting
- Make the filling by beating together Biscoff cookie butter, cream cheese, powdered sugar, and vanilla
- For the frosting, beat unsalted butter and sifted powdered sugar, then mix in Biscoff cookie butter, vanilla, and heavy cream until smooth
- Assemble the cake with layers of filling and frosting
Notes
Make sure all ingredients are at room temperature for best results.
Chill the cake once crumb coated before adding the final layer of frosting.
- Prep Time: 30 mins
- Cook Time: 25-30 mins
- Category: Dessert
- Method: Baking
- Cuisine: American
Nutrition
- Serving Size: 1 slice
- Calories: 580 kcal
- Sugar: 48g
- Sodium: 310mg
- Fat: 35g
- Saturated Fat: 20g
- Unsaturated Fat: 0g
- Trans Fat: 0g
- Carbohydrates: 65g
- Fiber: 1g
- Protein: 6g
- Cholesterol: 110mg